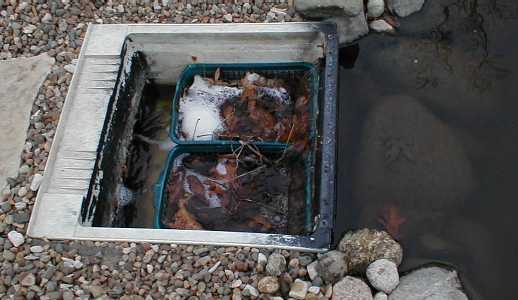
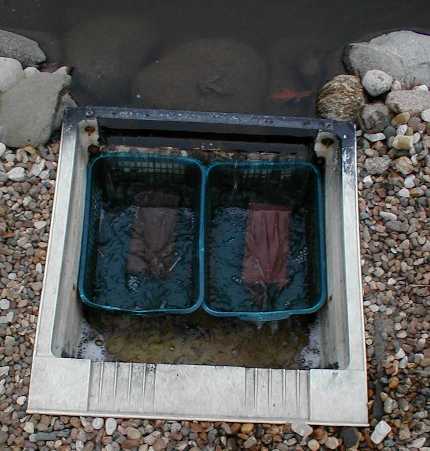
Pond water acts like a big peice of sticky tape. Anything that falls from a tree, or is laying on the ground will eventually make its way into the water. Twigs, leaves, blossoms, seeds, walnuts, plastic bags, the neigbors garbage. I've even found barmitzva wrapping paper in my pond, which is strange for a small town in Iowa. A pond skimmer operates in the same manner as a skimmer in a swimming pool. As water is drawn from the skimmer by a pump, water from the ponds surface flows into the skimmer. Debris is collected in a bag or basket of some sort. This is the first defense from keeping this debris from settling to the bottom of your pond and poluting your water. A skimmer should be installed in most medium to large ponds or in areas which have alot of trees or other ground clutter. The skimmer should be placed in the opposite corner of the pond from which the wind normally blows. In an established pond you will no what corner im talking about because the wind always blows the junk there. The only drawbacks i've encountered with a skimmer is that I can't to grow floating plants on my main pond. I have also had small fish get caught in the skimmer and die (specially during spawning season). If you have large trees near your pond, the skimmer may not be effective during heavy leaf season, as an abundant amount of leaves can clogs the mouth of your skimmer, which will reduce the flow of water and could harm your pump. A skimmer doesn't make a pond maintenance free, and Sometimes it seems like more of a hassel than a benefit, but for those few days when it give you problems, it makes up for it during the rest of the year. The following skimmer design requires that the water level in the skimmer must be below the top of the leaf baskets. Otherwise leaves will just flow over the baskets. This design will work with a submersable pump or an external one. If you use an submersable pump, use only one leaf basket so that you have room for the pump behind it. It is also possible to connect a bottom drain from the pond to your skimmer and put your submersable pump in your skimmer box. |
Materials (about $40)
| Item | Qty | Description | Size | Cost |
|---|---|---|---|---|
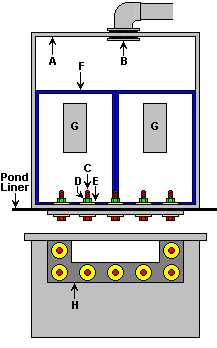
| A | 1 | Heavy Duty PVC Utility Sink | 20x18x12 deep. | $20 |
| B | 1 | Bulkhead Fitting * | 2" | $8 |
| C | 8 | Stainless Steel Bolts | 1/8" dia x 1" long" | $1 |
| D | 8 | Stainless Steel Nuts | 1/8" | $1 |
| E | 16 | Stainless Steel Washers | 1/8" | $2 |
| F | 2 | plastic baskets | 8"x16"x8"deep | $2 |
| G | 2 | Bricks | 4"x8" with holes | $1 |
| H | 1 | Sheet Plastic (faceplate) | 6"x20"x1/4" thick | $1 |
| I | 1 | Silicone | 50 Year Black | $5 |
Assembly (around 2 hours)
- Clamp the faceplate to the top of the container, centered in the middle so that the top edge of the faceplace matches the top edge of the container. The faceplace should be the same width as the container. If it is too big, cut it to match.
- Draw a rectangle on the front of the faceplate. The rectangle should be centered on the faceplace.
2" high. The width of the hole is dependent on the amount of water that will flow through the
skimmer, use the following as a guide:
1200 gph - 6" wide
2400 gph - 12" wide
4400 gph - 16" wide
- Drill twelve 1/8" holes evenly spaced around the perimeter of the faceplate. There should be a hole in each corner, and the remaining holes must not be more than 2" apart.
- Drill a 1/4" pilot hole at each corner of the inside rectangle.
- Cut out the inside rectange on the faceplate with a sabre saw (go through both the faceplate and the container). the excess.
- Remove the faceplace from the skimmer.
- If you plan on using a submersable pump, skip the two steps.
- Cut a hole in the back of the skimmer so that the bulkhead fitting will fit.
- Install the bulkhead fitting on the skimmer.
- Install the skimmer next to the pond. The bottom of the hole in the faceplace should be 1/2" below the water line. The skimmer opening should have full contact with the pond liner.
- Apply a bead of silicone around the skimmer opening between the skimmer and the liner
- Apply a bead of silicone around the faceplace
- Place the faceplace against the liner (silicone against the liner) so that the pond liner is sandwiched between the faceplace and the skimmer.
- Connect the faceplace to the skimmer box using the bolts. Place a washer on the bolt, push it through the hole, then another washer and the nut.
- Put one brick in each plastic container
- Place the plastic containers side by side in the skimmer
- If you are using a submersible pump, place the pump in the skimmer behind the plastic containers, otherwise use whatever piping is necessary to connect the bulkhead fitting to your pump.
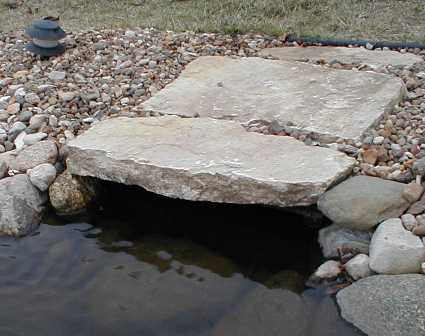
- I covered my skimmer with 1/4" plywood, then peices of flagstone.
- Empty the leaf baskets as necessary